An infrared thermometer at home: five practical uses and the one quantity everything depends on
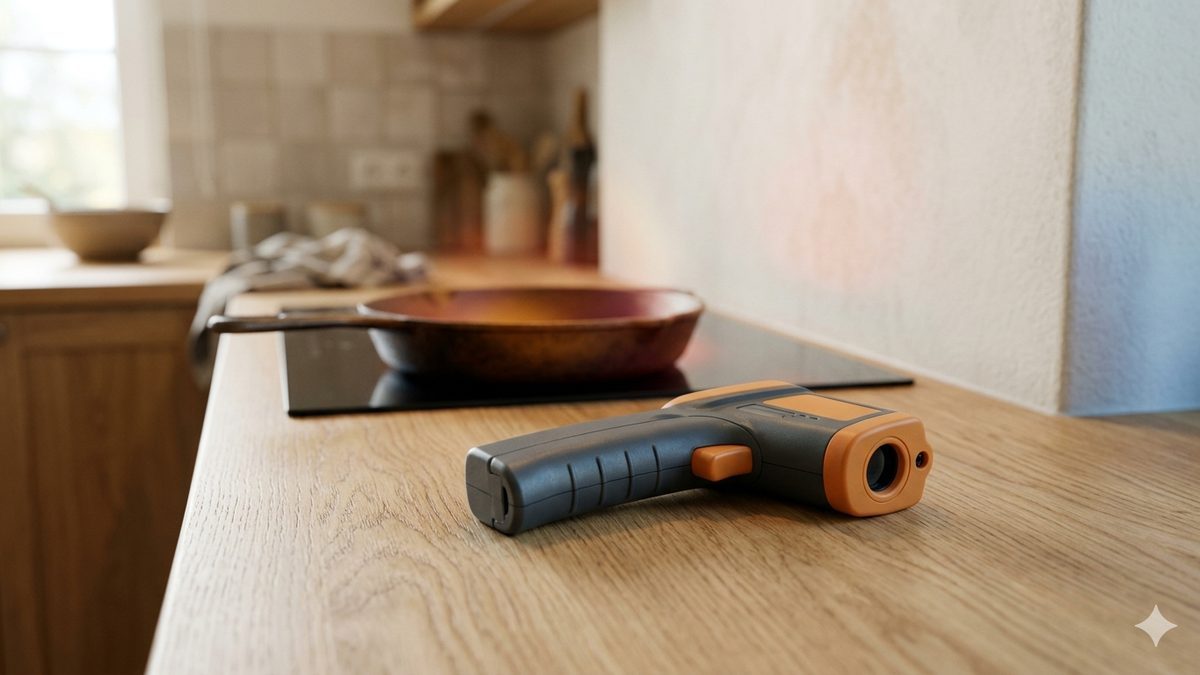
The article maps the five most useful household uses of a non-contact infrared thermometer — from preventing mold, through diagnosing thermal bridges and windows, to checking your washing machine, iron, and the temperature of oil in a pan — and the physics that ties them all together. The author shows that the key to accurate measurement is surface emissivity: without grasping it, the pyrometer reads nonsense on shiny metal, while on plaster, oil, or matte ceramic it measures reliably. He traces the whole principle back to Herschel's 1800 discovery of infrared radiation, which anticipated the theory of thermal radiation by a hundred years.
Rok 1800, Observatory House, Slough.
The astronomer William Herschel is looking for a way to observe the Sun safely, and along the way he notices that differently colored filters let through different amounts of heat. He splits a ray of sunlight with a glass prism and measures the temperature in each color; a thermometer with a blackened bulb is meant to show him how much energy each part of the spectrum carries. It is precisely below the red end — where the eye no longer sees anything — that the thermometer heats up the most. On that day Herschel discovered that beyond visible light something continues that the eye does not capture but that carries energy onward. He named it radiant heat. Today we call it infrared radiation (Herschel, Philosophical Transactions of the Royal Society of London, vol. 90, 1800, pp. 255–283).
Two centuries later the very same principle is hidden inside a plastic gun from an online shop costing three hundred crowns. A non-contact infrared thermometer — a pyrometer — measures the thermal radiation of a surface and converts it into a temperature. For a physicist it is an application of Planck's law and the Stefan–Boltzmann law. For an apartment owner it is a tool that, within a few seconds, reveals whether mold is growing in the corner behind the wardrobe, whether the washing machine is really heating the water, whether the iron is reaching its set temperature, and whether the oil in the pan has yet to reach its smoke point.
This article summarizes the five most useful household applications of the IR thermometer, the physics that connects them, and the one quantity without which you will read nonsense off a pyrometer.
The common key: emissivity
An infrared thermometer cannot "measure temperature" directly. It measures the intensity of the infrared radiation arriving from the target and works back to a temperature using the model of an ideal — so-called black — body. The trouble is that real surfaces do not radiate equally: dark, rough plaster radiates almost like a black body (ε ≈ 0.93–0.95), whereas polished aluminum radiates only a fraction (ε ≈ 0.05–0.10) and instead reflects the rest of the surrounding radiation. If you measure 38 °C on a polished stainless-steel pot of boiling water instead of 100 °C, it is not an instrument fault. It is a textbook demonstration of what happens when you ignore emissivity.
Every more decent IR thermometer lets you set the emissivity manually. The default value is usually ε = 0.95, which covers most household surfaces: plaster, paint, ceramics, wood, plastic, rubber, oil, water. The problem arises with metals, glass, and certain thin coatings — and that will be discussed below. Whoever remembers this rule gains a surprisingly powerful diagnostic tool out of an ordinary pyrometer. Whoever ignores it will read nonsense, and may even act on it.
1. The black spot in the corner: dew point and mold prevention
A January Sunday, −8 °C outside. You pull the wardrobe away from the perimeter wall and in the corner you find a dark-gray spot that was not there last year. To the touch the wall is markedly colder than the centers of the other walls. The question is not "is it mold?" — you can see that. The question is why the mold is growing there, whether the problem lies in the building or in your household, and whether it can appear elsewhere too.
An IR thermometer and a simple dew-point calculation will answer that.
Dew point: how much cold the air can take
The dew point is the temperature to which the air would have to be cooled for the water it contains to begin condensing. The higher the humidity, the higher the dew point. At 100% relative humidity the dew point equals the air temperature. In an apartment this yields one rule: if the air touches a surface colder than the dew point, water forms on the surface — and with it the ideal environment for mold.
For the calculation the August–Roche–Magnus formula is used in the form of Alduchov & Eskridge (1996), verified by Lawrence (2005) to an accuracy of ±0.35 °C over the range −40 to +50 °C:
γ(T, RH) = ln(RH / 100) + (17.625 × T) / (243.04 + T)
T_d = (243.04 × γ) / (17.625 − γ)
For a quick estimate in your head (at RH > 50%) the rule of thumb suffices: T_d ≈ T − (100 − RH) / 5.
In a room at 21 °C and 50% humidity the dew point thus comes out at 10.2 °C. Condensation occurs at a surface temperature below this value. But — and this is important — mold begins to grow even sooner.
Critical surface humidity of 80%
Dew points lie roughly in these ranges (°C) depending on air temperature and relative humidity:
• at 20 °C and humidity of 40–70% the dew point corresponds to 6.0 to 14.4 °C
• at 21 °C and humidity of 40–70% the dew point corresponds to 6.9 to 15.4 °C
• at 22 °C and humidity of 40–70% the dew point corresponds to 7.8 to 16.3 °C
• at 23 °C and humidity of 40–70% the dew point corresponds to 8.7 to 17.3 °C
• at 24 °C and humidity of 40–70% the dew point corresponds to 9.6 to 18.2 °C
Building molds such as Aspergillus, Cladosporium, and Penicillium, however, grow as soon as the local relative humidity at the surface reaches about 80%. That corresponds to a surface temperature roughly 3 °C higher than the dew point. For this reason the Czech technical standard ČSN 73 0540-2 does not use the dew point as its criterion but rather the critical surface humidity φ_si,cr = 80%. For openings (windows, doors) the standard allows a less strict criterion of φ_si,cr = 100%, that is, condensation itself.
In the model room at 21 °C and 50% humidity, then, the risk of mold arises at a surface temperature already below roughly 13.2 °C. Condensate will start running down the wall only below the dew point — but by then it is too late for prevention.
The temperature factor f_Rsi
ČSN 73 0540-2 assesses structures by means of the dimensionless internal-surface temperature factor:
f_Rsi = (θ_si − θ_e) / (θ_ai − θ_e)
where θ_si is the surface temperature, θ_e the outdoor temperature, and θ_ai the indoor air temperature. The advantage of this parameter is that it does not depend on the current temperatures — it is a property of the structure itself, much like the heat transfer coefficient U.
For residential buildings (θ_ai = 20 °C, φ_i = 50%) the standard yields, for building structures, a critical temperature factor of roughly 0.74–0.78 depending on the design outdoor temperature (in the Czech Republic typically −13 to −21 °C). For Prague, with a design temperature of −13 °C, this corresponds to a minimum surface temperature of about 11.9 °C. For openings the criterion is milder — a critical temperature factor of roughly 0.65 and a minimum surface temperature for Prague of about 8.4 °C.
In the 2025 revision of ČSN 73 0540-2, the earlier safety margin on the temperature factor is replaced by a constant addition of 5% to the relative humidity of the indoor air (in line with ČSN EN ISO 13788). The standard further specifies requirements for linear thermal bridges: the recommended psi-value is ψ ≤ 0.10 W/(m·K), the required one ≤ 0.20 W/(m·K).
How to do it in practice
You need an IR thermometer with the option of setting emissivity (for plaster and paint ε = 0.93–0.95) and any digital thermometer with a hygrometer.
Measure in winter, with steady heating (20–22 °C) for at least 24 hours, with a stable outdoor temperature ideally below −5 °C, and with the room unventilated for at least an hour before measurement. Let the IR thermometer acclimate to room temperature for about 15 minutes — a cold instrument reads incorrectly.
Systematically measure the critical spots from a distance of 30–50 cm: outer wall corners (both vertical and horizontal), window reveals, lintels and sills, the joints of walls with the floor and ceiling, the space behind furniture by perimeter walls (pull the wardrobes away), spots with visible damp stains. Record the lowest surface temperature and compare it with the dew point:
• if the surface temperature is below the dew point, this is active condensation
• if it is above the dew point by less than 3 °C, there is a high risk of mold (surface humidity over 80%)
• if it is 3–5 °C above the dew point, this is an increased risk — improve ventilation
• if it is more than 5 °C above the dew point, the risk is low
Specialized instruments such as the Testo 835-H1 combine an IR thermometer, a humidity sensor, dew-point calculation, and a traffic-light display of the risk in a single device. A cheaper alternative is the TFA Dostmann 31.1141, marketed as a Schimmel-Detektor (mold detector), with the same function at a fraction of the price.
2. Cold glass: thermal bridges and windows
The spot behind the wardrobe was the first clue. The second will lead you to the windows, because that is where the building "breathes" outward the most. The measurement principle does not change; only the figures and the emissivity of the target do.
How to find a thermal bridge
A thermal bridge is a place where heat passes through the structure more easily than through the surroundings. In winter it shows up as a cold patch on the inner surface of the wall. A thermal-imaging camera displays the whole temperature map at once — thousands of points simultaneously, at a price from 15,000 CZK upward. An IR thermometer measures only one point at a time, but for a systematic survey that is enough; you just need to know where to aim.
Rule of thumb: a difference in surface temperatures greater than 5 °C between the middle of the wall and its surroundings signals a thermal bridge. Typical spots: outer corners of rooms (heat escapes in two or even three directions), window reveals and lintels (especially with retrofitted insulation where the reveals were not insulated), the junction of the balcony slab with the perimeter wall (the reinforced-concrete slab passes through the insulation), the junction of the wall with the floor above an unheated cellar, and the housings of roller shutters and blinds.
U-values of glazing: from single glazing to triple glazing
The quality of glazing is determined by the heat transfer coefficient U_g (glass) and U_w (the whole window) in W/(m²·K). The lower the value, the better the glazing insulates:
• single glazing: U_g 5.7–5.8, whole window 5.0–5.8
• standard double glazing without low-e (air): U_g 2.7–2.8, whole window 2.6–2.8
• double glazing low-e with argon: U_g 1.0–1.1, whole window 1.1–1.4
• triple glazing with double low-e and argon: U_g 0.5–0.7, whole window 0.7–1.0
• triple glazing with krypton: U_g ≈ 0.4, whole window 0.6–0.8
The 2025 revision of ČSN 73 0540-2 requires for windows in a perimeter wall U_N ≤ 1.5 W/(m²·K), recommends U_rec ≤ 1.2, and for the passive standard U_pas ≤ 0.8. Single glazing and standard double glazing without a low-e coating have long failed to meet the standard's requirements.
What the thermometer should show
The inner surface temperature of the glass in the middle of the pane can be estimated in advance by the formula θ_si = θ_i − U_g × R_si × (θ_i − θ_e), where R_si = 0.13 m²·K/W is the heat transfer resistance on the inner side.
At 21 °C in the room and an outdoor temperature of −10 °C, the inner surface of single glazing comes out at roughly −2.4 °C (at −15 °C outside, −6.1 °C), for standard double glazing 9.7 °C (or 7.9 °C respectively), for double glazing with low-e and argon 16.6 °C (or 15.9 °C), and for triple glazing with low-e and argon 18.2 °C (or 17.7 °C).
At 50% humidity in the room (dew point 10.2 °C) single glazing always condenses — it ices up from the inside, water runs down the sill. Standard double glazing without low-e condenses when it is below −10 °C outside. Double glazing with low-e is safe under ordinary Czech winter conditions; triple glazing is safe even at 60% humidity.
The spacer bar: the weakest point of the window
A detail that a layman overlooks and that nonetheless decides condensation at the sill: the spacer bar between the panes. An aluminum bar with high thermal conductivity lowers the glass temperature at the edge by roughly 4 °C compared with the middle of the pane — it is the weakest spot of the whole window. A "warm" spacer bar of stainless steel, plastic, or composite reduces this temperature drop to 1–2 °C and, according to the available data, eliminates up to 70% of cases of condensation at the edges of the glass. The psi-value of an aluminum bar is 0.08–0.11 W/(m·K), of a warm bar only 0.03–0.06.
Conditions for reliable measurement
Measure in winter (November to March), under an overcast sky without direct sun — direct sunlight heats the façade unevenly for hours in advance. You need a stable outdoor temperature for at least several hours and a minimum difference of 15 °C between inside and outside, that is, at 21 °C indoors it must be below +6 °C outside, ideally below 0 °C. The best time is early morning or evening. Wind below 12 km/h.
For measuring glass, set the emissivity to ε ≈ 0.85–0.90; for plastered and painted walls to ε ≈ 0.93–0.95. Watch the D:S ratio (distance to the diameter of the measuring spot): at a D:S of 12:1 and a distance of 1.2 m you are measuring a circle 10 cm in diameter — for small details such as the corner of a window frame you must bring the thermometer to within 15–20 cm.
Professional thermal-imaging measurement of buildings in the Czech Republic is governed by the standard ČSN EN 13187 (Thermal performance of buildings — Qualitative detection of thermal irregularities in building envelopes — Infrared method) and typically costs 3,000–8,000 CZK per house.
3. Warm or cold door: is the washing machine heating the water?
From the building envelope we move inside, to the appliances. A faulty heating element in a washing machine is one of those faults a person notices only after several weeks: the laundry smells musty, the detergent does not dissolve, white T-shirts turn a dingy gray after ten washes. The traditional check means dismantling the rear panel and measuring the element with a multimeter. The IR thermometer can do it without tools.
Procedure
Set the cotton 60 °C program (not eco, not gentle). After 15–20 minutes from the start (the element activates only after the water has been drawn in), aim the IR thermometer at the center of the door glass from 15–20 cm. An emissivity of ε ≈ 0.92–0.95 corresponds to ordinary glass with a plastic frame.
What to expect: with a functioning element on the 60 °C program the glass is noticeably warm, the thermometer showing on the order of 35–50 °C. On the 90 °C program it is 50–70 °C. With a faulty element the glass stays at room temperature even after 20 or more minutes.
Why never "eco"
European Commission Regulation (EU) 2019/2023, in force since 1 March 2021, requires washing-machine manufacturers to declare consumption according to the "eco 40-60" program. It is designed for washing cotton recommended for both 40 °C and 60 °C in a single cycle, and it achieves energy efficiency, among other things, by heating the water markedly less than the "60 °C" program label would suggest. The program therefore does not deceive — it does not declare 60 °C — but it is unsuitable for checking the heating element, because the real temperature is too low and the spread between models is too large.
A separate problem was uncovered by the British magazine Which? in a comparative test from 2013. On the standard cotton 60 °C program (that is, not eco) it tested the wash-bath temperature of twelve models — and eight of them did not reach 60 °C at all. The lowest measured value was 43 °C. The test has not since been repeated on a comparable scale, so it serves more as an illustration of the principle than as a current overview of the market; the tendency of manufacturers to save energy at the expense of the declared temperature is, however, confirmed by later measurements too.
To check the heating element, therefore, choose the standard cotton program, not eco, and, if the machine offers it, rather 90 °C, where the contrast against room temperature is unambiguous.
Alternative measurement points
If the washing machine has double-glazed door glass (modern models with better insulation) or a plastic insulating layer, the outer temperature of the glass may be low even with a functioning element. Alternatively, measure the drain hose (ε ≈ 0.95) during the discharge of the main wash, or the lower part of the machine's body near the heating element.
A faulty element also manifests in other symptoms: the detergent does not dissolve, the laundry stinks, the machine does not complete the cycle (it waits to reach temperature), and modern machines display an error code. Their mapping to specific faults, however, depends on the manufacturer and model and often does not agree across brands:
• Bosch and Siemens display, for an exceeded heating time (typical cause: a burned-out heating element, limescale, or a faulty thermistor), the code E19 / F19. Codes E05 / E06 indicate, in the same manufacturers, a fault of the NTC temperature sensor.
• With Whirlpool the code F05 is model-dependent: on the Duet and Kenmore Elite ranges it signifies a fault of the NTC sensor or the heating circuit, whereas on 6th Sense machines it signifies a drainage problem. The error code is therefore not a reliable indicator with this brand — check the water drainage too.
• Samsung uses for heating errors the codes HE, HE1, HE2; the codes tE, tC indicate a faulty temperature sensor.
Definitive confirmation comes from a multimeter: a functioning heating element has a resistance of 20–50 Ω; a broken one reads infinity.
4. Three dots on the label: does the iron reach its temperature?
From the washing machine it is a short path to the iron. Irons age — the thermostat wears out, the calibration drifts — and after five years the "cotton" setting can mean anything from 150 °C to 220 °C. Most people notice it only when they melt a polyester blouse, or conversely cannot iron out a cotton shirt.
What the dots mean
The symbols on textile labels are defined by the international standard ISO 3758. Its newest version is ISO 3758:2023 (published in December 2023, superseding the 2012 version), but the temperature limits of the three dots have, contrary to a number of widespread claims, not changed:
• one dot — max 110 °C — polyamide, acrylic, acetate
• two dots — max 150 °C — wool, silk, polyester, viscose
• three dots — max 200 °C — cotton, linen
What is new in the 2023 revision is a separate symbol for ironing without steam with a maximum of 120 °C (for materials on which steam would cause irreversible damage), several graphic adjustments harmonized with GINETEX, and new exemptions for carpets and non-detachable covers. The literal upward shift of the "ironing dots" by 10 °C that circulates around the revision in the media and instructions therefore did not happen.
Pure linen is, in practice, ironed at up to 200–230 °C, often with steam; the temperature testing of irons themselves is governed by a different standard, IEC 60311.
How to measure
Switch the iron on to the desired setting and wait until the thermostat has cycled at least once (the indicator light goes off and comes on again). After this stabilization, wait 60 seconds. With the IR thermometer aim at the center of the soleplate from 10–15 cm and take several measurements: the temperature oscillates as a result of thermostat cycling, typically within a range of ±5–10 °C around the set value. The actual operating temperature is the average of the maximum and the minimum.
According to the available tests, most household irons deviate by ±15–18 °C from the set value because of uncalibrated thermostats. The IR thermometer is the easiest way to detect that deviation.
The trap: emissivity of the soleplate
Here we run into the same problem as with the polished pot in the introduction. The emissivity of the iron's surface differs dramatically by material:
• glazed ceramic: ε 0.85–0.95 — excellent accuracy at the default ε = 0.95
• a thick layer of Teflon / PTFE: ε 0.92–0.95 — almost no correction needed
• ground or satin-finished stainless steel: ε 0.50–0.70 — without correction it reads markedly less (about 130–140 °C instead of the real 200 °C)
• polished stainless steel: ε 0.15–0.30 — practically unmeasurable without correction
• polished aluminum: ε 0.05–0.10 — unmeasurable
• anodized aluminum: ε 0.60–0.95 — acceptable with correction
If you have a stainless-steel soleplate, there are two ways: either set the emissivity on the thermometer to 0.50–0.60, or use the proven trick with black electrical tape (ε ≈ 0.95) — stick a strip of tape on the surface, let the temperature equalize (30–60 seconds), and measure on the tape. The thermometer then reads the emissivity of the tape, not of the metal.
Beware also of a thin layer of Teflon: if the coating is thin (on the order of micrometers) and worn, the IR radiation partly "shines through" to the underlying metal and the effective emissivity drops to 0.38–0.46. For old, worn Teflon irons I therefore also recommend the tape trick.
5. Oil in the pan: when polished stainless steel lies
Finally, we leave the cold side of physics and move to the kitchen. Here the IR thermometer becomes almost the only practical measuring device: a probe thermometer needs a depth of oil that, in shallow frying, you simply do not have.
Why polished stainless steel does not work
You pour water into an empty polished stainless-steel pan, bring it to a boil, aim the IR thermometer — and you read 38 °C. Meanwhile the pan is bubbling at a hundred degrees. In principle this is the same situation as with the stainless-steel iron: polished stainless steel has an emissivity of around 0.07–0.17, so it reflects most of the infrared radiation instead of emitting it. The thermometer is reading the temperature of the ceiling, the walls, and your face projected onto the shiny surface. On dully oxidized cast iron (ε 0.64–0.97 depending on condition) and on a ceramic or Teflon non-stick surface (ε 0.92 and above) the situation is entirely different — there the IR thermometer works reliably.
The key to measuring oils is then elegant: the oil itself has an emissivity of 0.94–0.95, which is practically the ideal value. As soon as there is oil in the pan, you are measuring the oil — not the metal beneath it. Even a thin layer is enough.
Step by step
1. Pour the oil into the pan — even a thin film is enough as a high-emissivity "target" for the IR thermometer.
2. Just before measuring, stir the oil. Without stirring the surface is colder than the lower layers; the difference can be 10–20 °C.
3. Aim perpendicularly from above onto the surface of the oil from 20–30 cm. The measuring spot must fall entirely onto the oil, not onto the edge of the pan — that reads a different temperature, because the metal edge is colder or shiny and reflects.
4. Read the temperature and regulate the burner output. As soon as the oil approaches the smoke point, lower the output.
5. Keep the lens clean. Grease and steam distort the reading. After each cooking session, wipe the lens with a soft cloth.
Optimal frying temperatures
• omelet, fried eggs: 120–150 °C
• shallow frying of schnitzels and croquettes: 160–180 °C
• deep frying of fries and doughnuts: 170–190 °C
• searing fish: 160–190 °C
• searing meat with the Maillard reaction: 200–230 °C
• frying in a heated wok (stir-fry): 200–230 °C
In restaurants the surface of a wok during frying can exceed 370 °C, but that requires a suitable oil and the absence of water. At home, better to avoid this region.
Smoke points of common fats
The smoke point is the temperature at which oil visibly smokes and breaks down — releasing toxic acrolein and other degradation products. Rule: choose an oil with a smoke point at least 20–30 °C above the planned frying temperature.
• butter: 150–177 °C
• extra virgin olive oil: 160–210 °C depending on quality
• virgin coconut oil: 177 °C
• lard: 190–200 °C
• refined olive oil (pomace): 199–242 °C
• refined coconut oil: 204–232 °C
• refined rapeseed (canola) oil: 204–246 °C
• refined sunflower oil: 227–232 °C
• refined peanut oil: 232 °C
• ghee (clarified butter): 232–252 °C
• refined avocado oil: 249–271 °C
Safety: flash point and autoignition
And a last, rather unpleasant figure. The flash point of vegetable oils typically lies around 300–335 °C — at this temperature the vapors ignite from an open flame. The autoignition point is 400–435 °C — the oil bursts into flame by itself, without an external source. Between the smoke point and the flash point there is a safety reserve of 80–100 °C, but once the oil starts to smoke, the temperature rises quickly and nonlinearly.
Cooking is, according to American statistics, the most common cause of house fires (roughly half of all reported residential-building fires), and the main factor in the outbreak of these fires is unattended cooking — according to an analysis by the U.S. Fire Administration (USFA) for the years 2017–2019, this accounted for approximately 37% of cooking-related fires. This is precisely why the IR thermometer is a practical preventive tool: it allows you to monitor the oil temperature continuously and lower the output before it approaches the risky region.
If the oil does nevertheless ignite: never pour water on it. A steam explosion will spray the burning oil all over the kitchen and turn a small fire into a catastrophe. The correct procedure: turn off the stove, cover the pan with a lid or a fire blanket, or use a Class F fire extinguisher. In the Czech Republic, then call 150.
Back to Herschel
What connects the dew point in the corner behind the wardrobe, the surface temperature of triple glazing, and the smoke point of sunflower oil? Every surface above absolute zero radiates infrared radiation whose intensity corresponds to its temperature — and whose character depends on how well the particular material is able to radiate its heat.
That second part of the sentence is called emissivity, and it is the reason why the IR thermometer works reliably on dark plaster, oil, and matte ceramics, and why on a polished pot it shows nonsense. A pyrometer costing three hundred crowns has no advantage in resolution or accuracy over a professional thermal camera costing fifty thousand. Its only advantage is accessibility — and the fact that it gives you a tool through which you see something that the eye, in principle, does not see.
Herschel's 1800 experiment, moreover, ran a full century ahead of the theory of thermal radiation: Josef Stefan formulated his law on the dependence of radiation on the fourth power of temperature only in 1879, Ludwig Boltzmann derived it theoretically in 1884, and Max Planck explained the black-body spectrum only in 1900. Once you grasp this one rule about emissivity, the plastic gun for a few hundred crowns becomes a surprisingly attentive helper: it reveals growing mold before you see it, distinguishes quality glazing from outdated glazing, exposes a dead washing-machine heating element, an uncalibrated iron thermostat, and the smoke point of oil. Without contact, in a few seconds, from your kitchen table.
Herschel himself thought of radiant heat as "invisible light" — rays of the Sun that, in his own words, have properties that do not cause the sensation of sight. He later partly cast doubt on the hypothesis in subsequent papers; his original experiment with thermometers on a bench, however, remained. When you acquire a pyrometer and learn to use it, for a few seconds you too find yourself in that original experiment — just with a better thermometer.
Sources
• Herschel, W. Investigation of the powers of the prismatic colours to heat and illuminate objects; with remarks, that prove the different refrangibility of radiant heat. Philosophical Transactions of the Royal Society of London, vol. 90 (1800), pp. 255–283. DOI 10.1098/rstl.1800.0014. — Experiments on the Refrangibility of the invisible Rays of the Sun. Ibid., pp. 284–292.
• Alduchov, O. A., Eskridge, R. E. Improved Magnus Form Approximation of Saturation Vapor Pressure. Journal of Applied Meteorology, 35/4 (1996), pp. 601–609.
• Lawrence, M. G. The Relationship between Relative Humidity and the Dewpoint Temperature in Moist Air: A Simple Conversion and Applications. Bulletin of the American Meteorological Society, 86/2 (2005), pp. 225–233.
• ČSN 73 0540-2 (2025 revision) — Tepelná ochrana budov. Část 2: Požadavky (Thermal protection of buildings. Part 2: Requirements).
• ČSN EN 13187 — Tepelné chování budov. Kvalitativní určení tepelných nepravidelností v pláštích budov. Infračervená metoda (Thermal performance of buildings. Qualitative detection of thermal irregularities in building envelopes. Infrared method).
• ISO 3758:2023 — Textiles — Care labelling code using symbols.
• IEC 60311 — Electric irons for household or similar use — Methods for measuring performance.
• Commission Regulation (EU) 2019/2023 of 1 October 2019, in force since 1 March 2021 — ecodesign requirements for household washing machines.
• Which? magazine, comparative test of washing-machine temperatures on the cotton 60 °C program (2013).
• U.S. Fire Administration, Cooking Fires in Residential Buildings (2017–2019), NFIRS statistical yearbook.
The concept, structure, and editorial line of the article are the work of the author, who prepared the content outline, set the key theses, and directed the entire creative process. Generative AI (Claude, Anthropic) was used as a tool for research, fact-checking, and fleshing out the author's draft.
The author edited the outputs continuously, verified the key findings, and approved the final wording. No part of the text was published without human review. All factual data were verified against the publicly available sources cited in the text.
The procedure complies with the requirements of Art. 50 of EU Regulation 2024/1689 (AI Act) on the transparency of AI-generated content. #poweredByAI
Read the Czech original on Médium.cz.
AI · Claude — machine translation, may contain inaccuracies.